
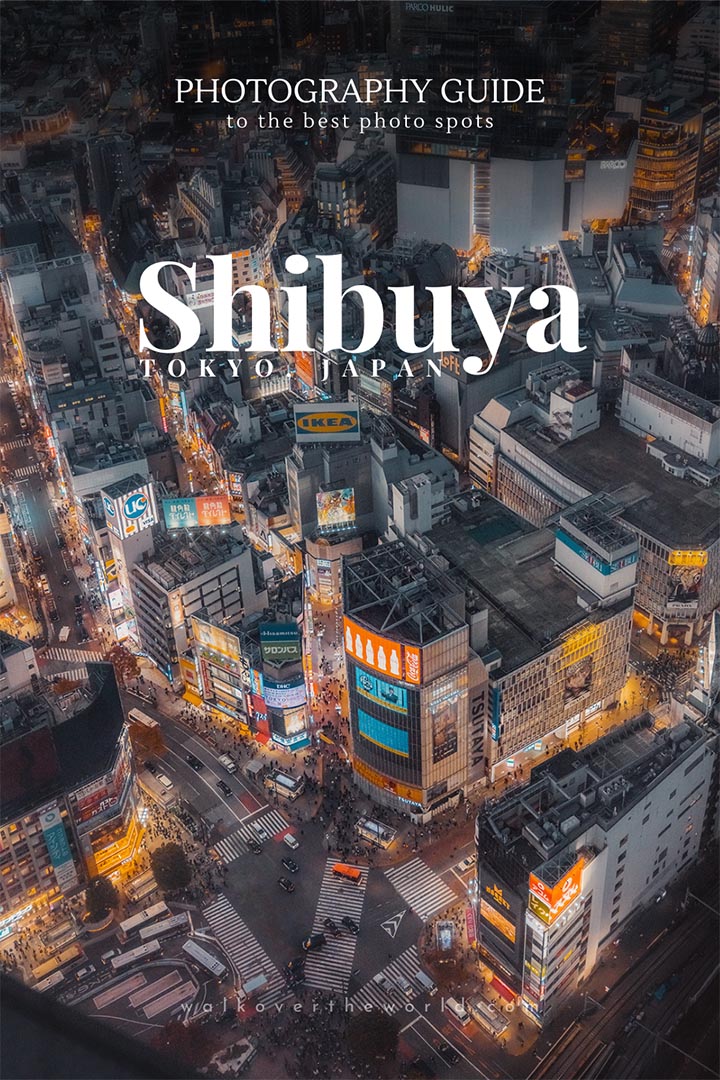
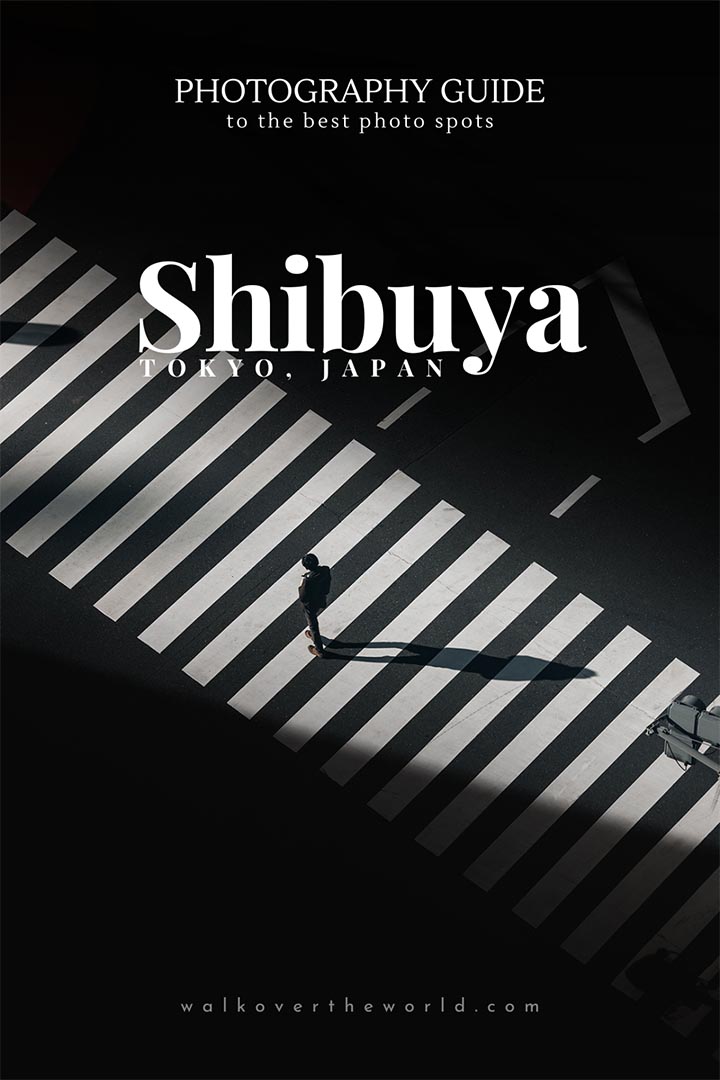
Shibuya Photography Guide to the best photo spots
With the help of this guide, we’ll explore the various sides that Shibuya has to offer, each giving a distinctive viewpoint on the dynamic fabric of Tokyo life. Shibuya offers an unmatched photographic experience, whether you’re drawn to the harmonious display of colours along Takeshita Street, the serene allure of Nonbei Yokocho, or the ethereal atmosphere around Meiji Shrine.
Come along with me as we explore Shibuya’s top photo locations, opening up a visual feast that perfectly conveys the essence of this fascinating city. Every shot in this bustling metropolis, from various perspectives of the famous Shibuya Crossing to the exquisite cherry blossoms bordering Sakura Street, conveys a tale. Now that you have your camera ready and your batteries charged, let’s explore the fascinating world of Shibuya.
Get Directions
Shibuya Sky
Best photo spot in Shibuya
Best time: be there 30-60 min before sunset
Photography Equipment: 24-70mm, but you have access to the lockers and can change the lenses. Use lens-hood, because you will take all photos through glass.
Photo spot(s): Shibuya Sky observatory
Entry fee: 2.200 Yen (online) / 2.500 Yen (front-desk)
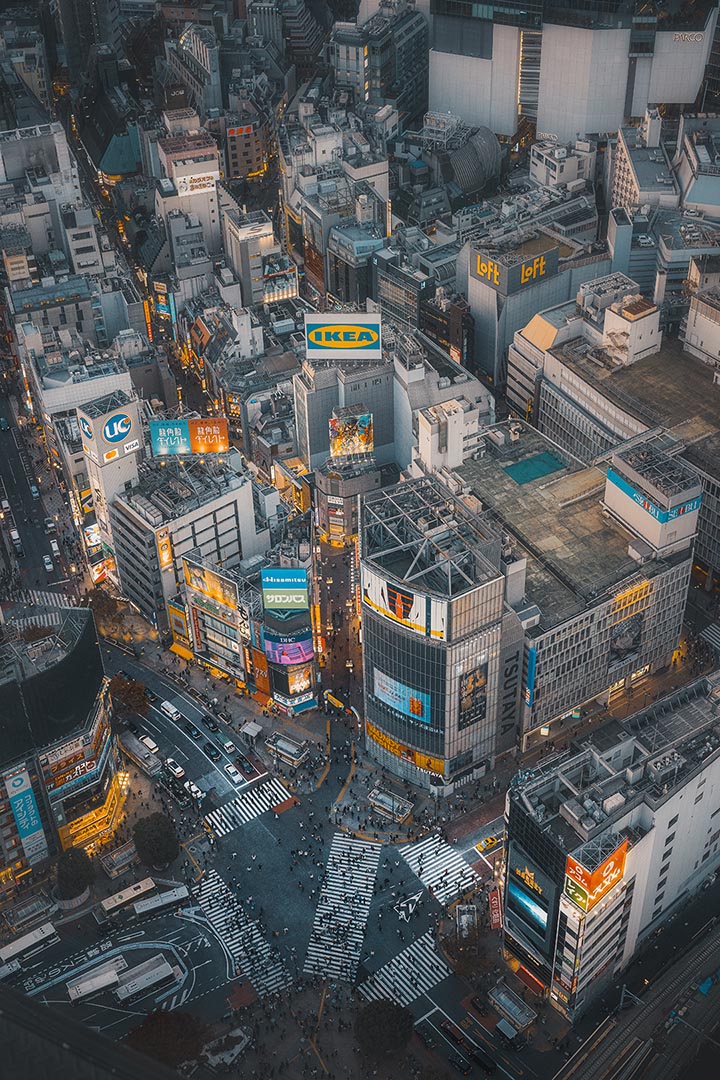
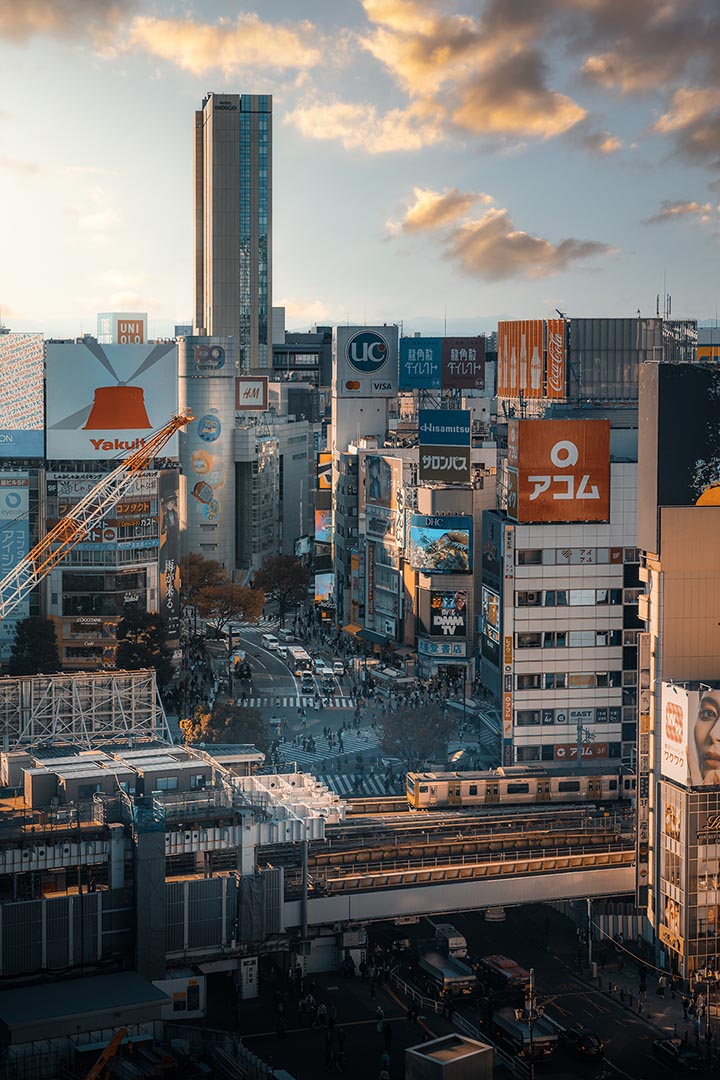
Strategic planning and technical dexterity are required to capture the unmatched beauty of Shibuya from above at the Shibuya Sky, a premier photo destination. This is your photographer’s guide to making the most of this unique viewpoint for your photos.
When it comes to Shibuya Sky, timing is crucial, and the golden hour until the blue hour is the best time of day. To see Tokyo’s skyline illuminated with the warm tones of twilight, arrive 30 to 60 minutes before sunset. With its fascinating glow cast over the city’s prominent monuments, this beautiful window offers the ideal lighting conditions for capturing the dynamic vitality of the metropolis.
Get your 24-70mm lens for the challenge of shooting constantly shifting perspectives. You can easily switch between wide-angle cityscapes and close-up details of far-off places with this range. You have access to the lockers and can change the lenses. In order to reduce glare and reflections and ensure clear, distortion-free photos, don’t forget to apply a lens hood.
Shibuya Sky is a highly sought-after location for photos, and reservations at peak hours—particularly before sunset—sell out fast. I suggest buying tickets four weeks in advance to ensure your spot. This becomes even more important when the demand surges in the autumn or during the cherry blossom season. Make sure you have your ticket for the best shooting conditions, and don’t leave it to chance or wait at Shibuya Sky for hours.
Despite its increased hours, Shibuya Sky remains a popular attraction and can get congested. Consider this expert advice if you’re looking for fewer interruptions in your photos: once you exit the lift, turn inside the building towards exit. By using this move, you may take stunning photos without having to deal with long lineups or rush for the ideal angle of Shibuya crossing. It’s your key to taking in the breath-inspiring sights away from the typical commotion.
Mag's Park Rooftop
Best photo spot in Shibuya
Best time: be there 60 min before sunset to get still light on the crossing
Photography Equipment: wide-lens recommended. Use lens-hood, because you will take all photos through glass.
Photo spot(s): in the corner on the rooftop of Mag’s Park
Entry fee: 600 Yen includes one free drink
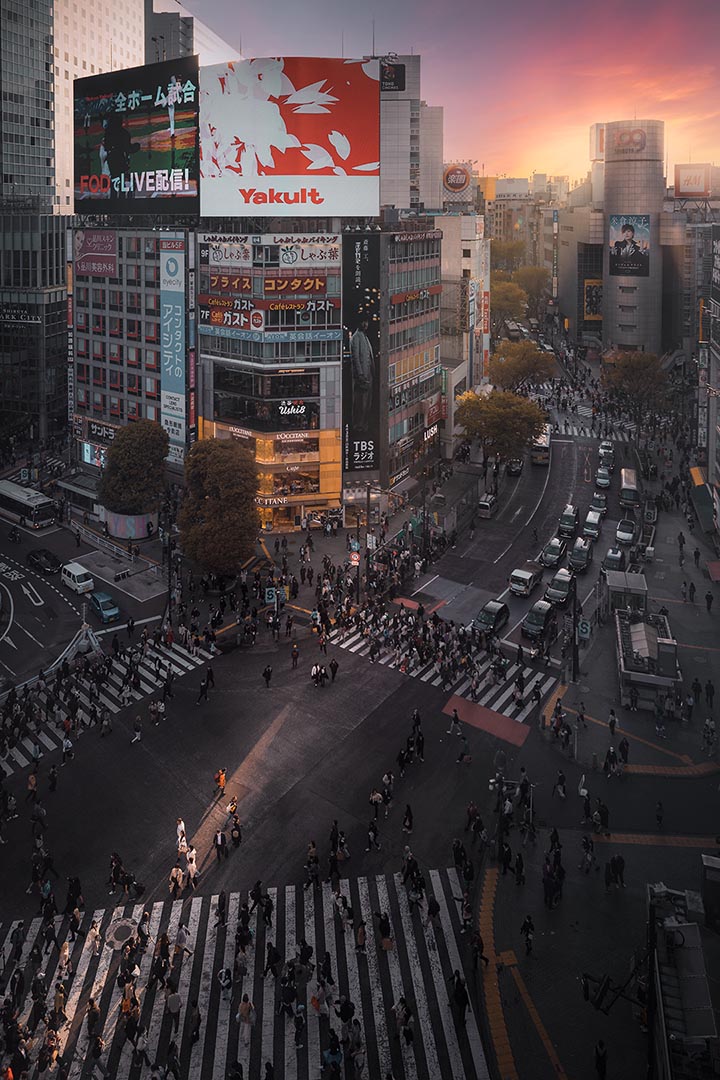
Discover the beating heart of Tokyo with us as we take you on an unforgettable visual tour from the coveted Mag’s Park Rooftop, which provides an unmatched view of the famous Shibuya Crossing.
Plan your visit to Shibuya Crossing precisely to capture its dynamic energy. If you go there an hour before dusk, you can make sure to photograph the crossing in a gentle, steady light that highlights the details and creates a mesmerising ambience. Don’t leave too soon, though; wait until Tokyo’s captivating artificial lights come up during blue hour. The striking change in lighting from natural to artificial creates a distinct colour palette that elevates your shots to a whole new level at this photo spot.
Equip yourself with a wide-angle lens for the best shots of Shibuya Crossing. A lens capable of capturing the entire crossing and surrounding cityscape is necessary due to its huge size. In addition, since you will be shooting through glass, it is essential that you use a lens hood. With the help of this easy-to-use attachment, you can reduce reflections and eliminate unwanted glare from your photos, so you can concentrate on the captivating events that are taking place in front of you.
For a reasonable 600 yen, you may access this unmatched photo location at Mag’s Park Rooftop. It’s a tiny price to pay for the gorgeous treat that awaits you. Additionally, your admission price includes a free drink, so you may unwind and refresh while taking in the stunning scenery of Shibuya Crossing. It’s the ideal finishing touch to make your whole photography experience even better.
Try out several compositions as the sun sets to capture the flow of Shibuya Crossing. Watch the metropolis turn into a magnificent tapestry of lights as the blue hour comes. Experiment with long exposures to get airy, dynamic photos that capture the paths of passing lights. You can explore a variety of angles at Mag’s Park Rooftop to craft your own unique Shibuya Crossing masterpiece.
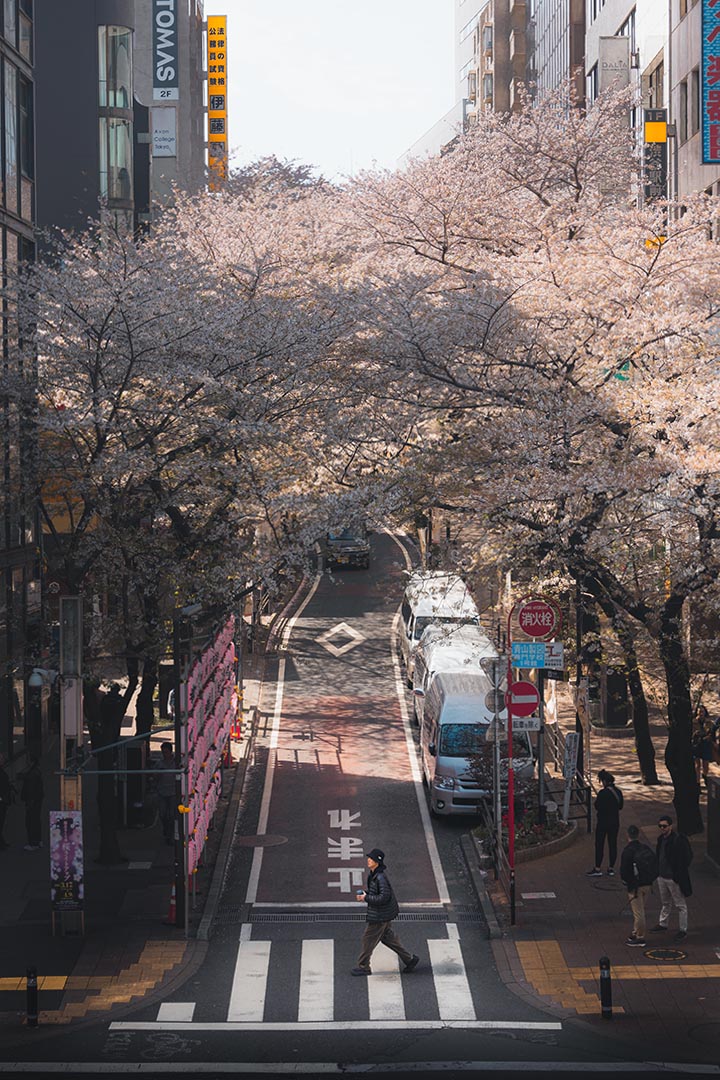
Sakura Street
Best photo spot in Shibuya
Best time: early morning during cherry blossom season
Photography Equipment: full range (wide- to tele-lens)
Photo spot(s): at the crossing / other side of intersection with tele-lens / on the bridge
Explore the breathtaking beauty of cherry blossoms on Tokyo’s well-known Sakura Street, also known as Sakuragaokacho.
When attempting to capture the ephemeral beauty of cherry blossoms, timing is crucial. When Sakura Street is bathed in beautiful, gentle light during cherry blossom season, set your alarm for the early morning hours. The flowers are bathed in a tranquil glow from the dawn’s embrace, creating a surreal scene that is ideal for your photography adventure. Early mornings also provide a more quiet experience, enabling you to completely savour the beauty of the present.
Sakura Street provides a diverse range of images, from broad panoramas of the entire street to up-close portraits of fragile blooms. Equip yourself with an extensive selection of lenses, ranging from telephoto to wide-angle. You can capture the grandeur of the street with a wide-angle lens and the delicate nuances and beauty of individual petals by zooming in with a telephoto lens.
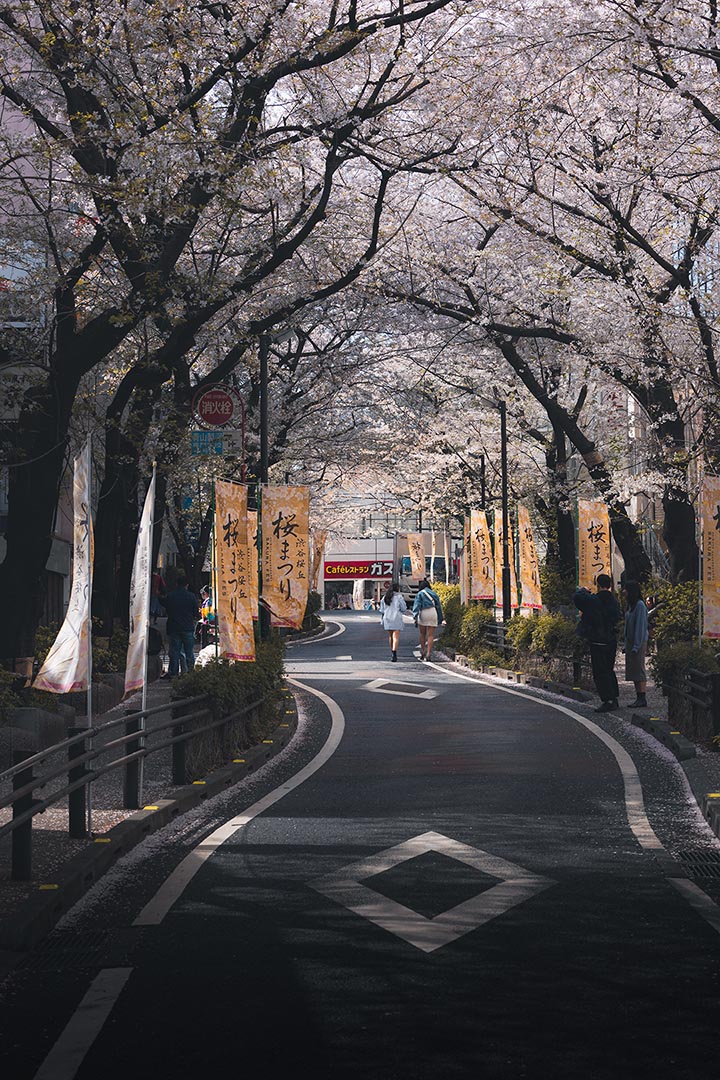
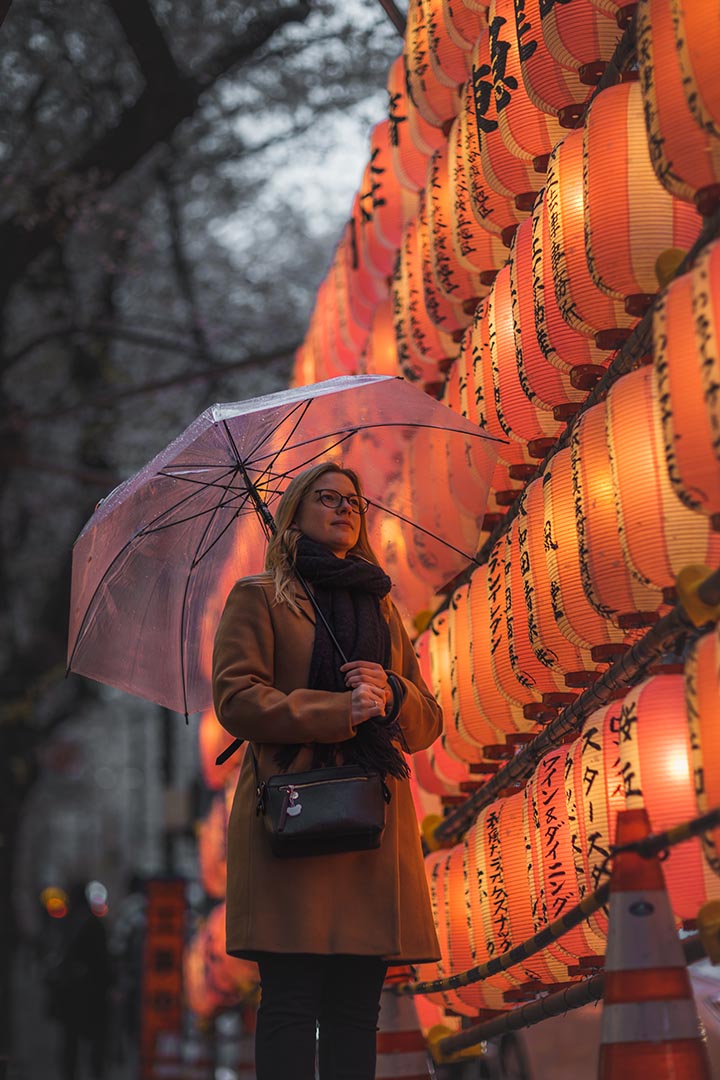
Photo Spots: Crafting Perspectives
- The Crossing Viewpoint: Take a position in the middle of the road and photograph the flowers that surround the busy crossroads. For this location, a wide-angle lens works best since it lets you capture the whole panorama and highlight the way that nature and the urban landscape interact.
- Other Side of the Intersection: With the entire crossing in the foreground, you may get another lovely view of Sakura Street from the opposite side of the intersection.
- Top of the Bridge: For an aerial perspective of Sakura Street, head to the top of the neighbouring bridge. Take pictures of the crossing that is bordered with cherry blossoms. Your photos gain depth from this vantage point, which highlights the size and magnificence of the blossoms at their peak.
Shibuya Hikarie Skylobby
Best photo spot in Shibuya
Best time: be there around 90 min before sunset
Photography Equipment: standard lens and tele-lens
Photo spot(s): Skylobby at 11th floor or 9th floor
Entry fee: free
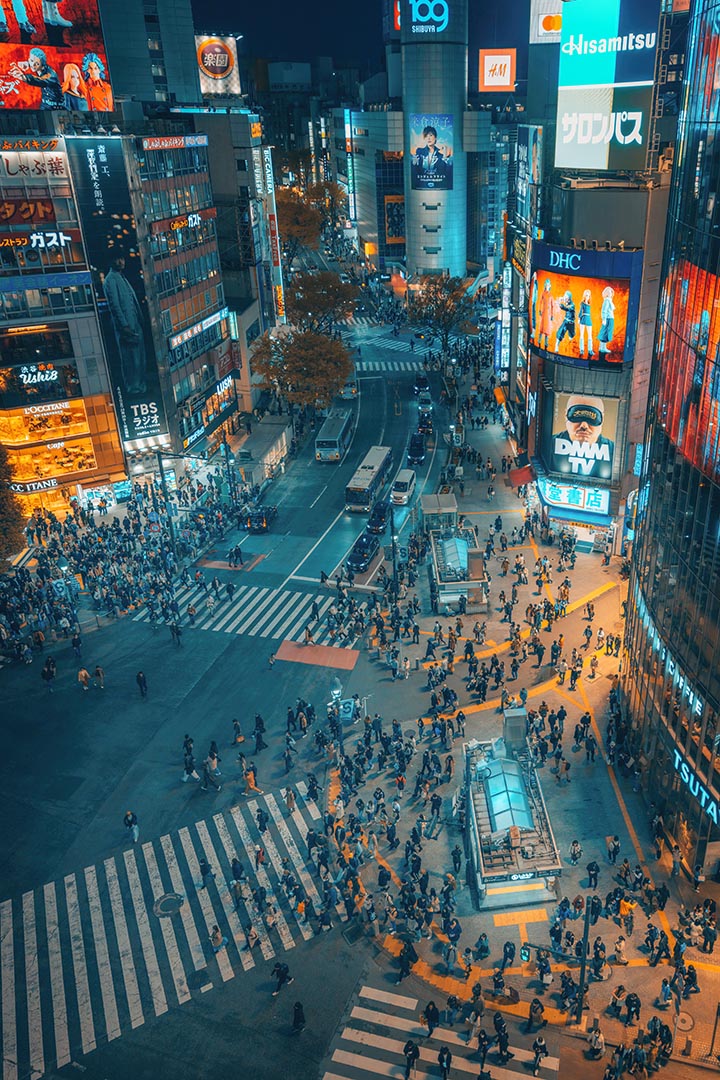
Experience a breathtaking aerial tour of Tokyo’s bustling streets as we investigate the ever-changing Shibuya Crossing from the expansive Hikarie Mall Skylobby. Find out when the best time is to go, what photographic gear is necessary, where to take the finest pictures, and a pro tip that reveals a hidden gem inside this famous photo destination in this guide. This is my favourite photography spot to take shots from Shibuya Crossing.
When trying to capture the spirit of Shibuya Crossing from Hikarie Mall Skylobby, timing is everything. To enjoy the golden hour, which is when the busy crossing below is bathed in warm, soft light that creates a mesmerising atmosphere, arrive around 90 minutes before sunset. This magnificent window offers the ideal chance to capture the vibrant atmosphere and dynamic energy of Tokyo’s famous junction.
In order to appreciate Shibuya Crossing from the Skylobby to its fullest, arm yourself with both a regular and a telephoto lens. The telescopic lens enables you to focus on minute details and isolate special moments amidst the busy crowd, while the regular lens is ideal for capturing a wide-angle view. You will be able to frame photos that vary from close-ups of individual pedestrians to wide-angle cityscapes thanks to this adaptable combo.
The 11th floor and the 9th floor of the Hikarie Mall Skylobby are two amazing locations for photos. There’s no floor ten. You may witness the expansive show from a higher vantage point on the 11th floor, which offers expansive views of Shibuya Crossing. Here’s a pro tip, though: ride the escalator down to the ninth floor. With so much space for photography, this undiscovered gem lets you take pictures of the famous crossing away from the throng, which gives your photos a special, personal touch.
Savour the bonus that comes with using this amazing photo location—it’s totally free. Photography enthusiasts and experts alike can enjoy an affordable and high-quality view of Shibuya Crossing by having access to the Skylobby at Hikarie Mall.
Meiji-Shrine
Best photo spot in Shibuya
Best time: early morning to avoid crowds
Photography Equipment: tele-lens
Photo spot(s): Jingu Nino Torii & Jingu Sanno Torii / Sake Barrels / Jingu Kitasando Torii
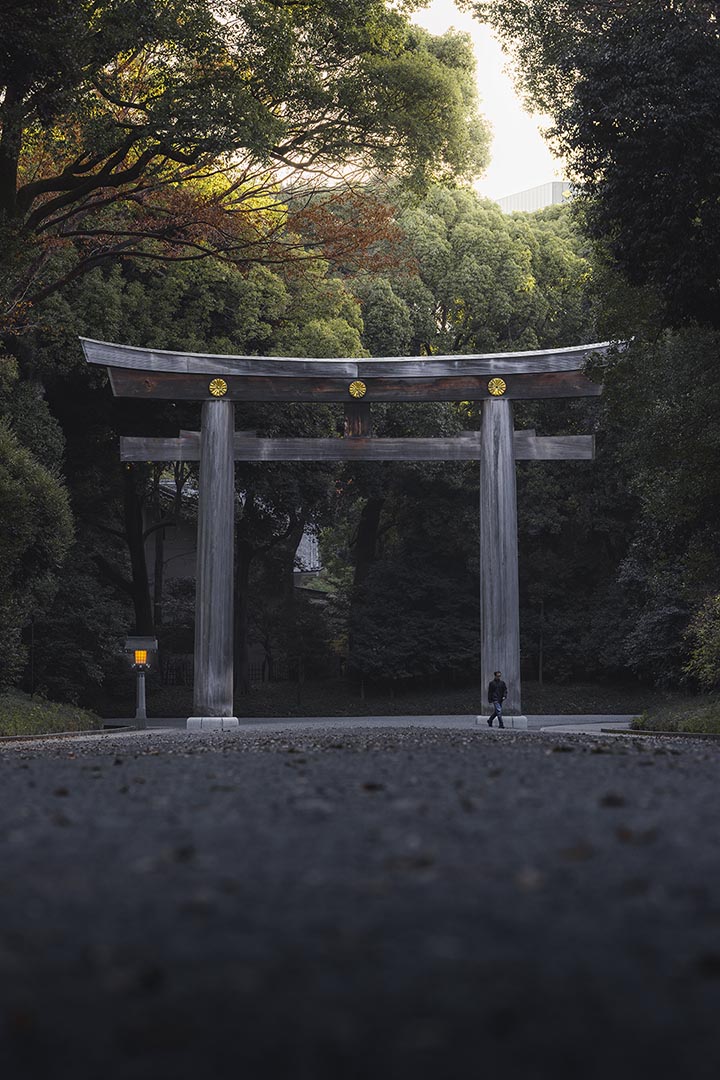
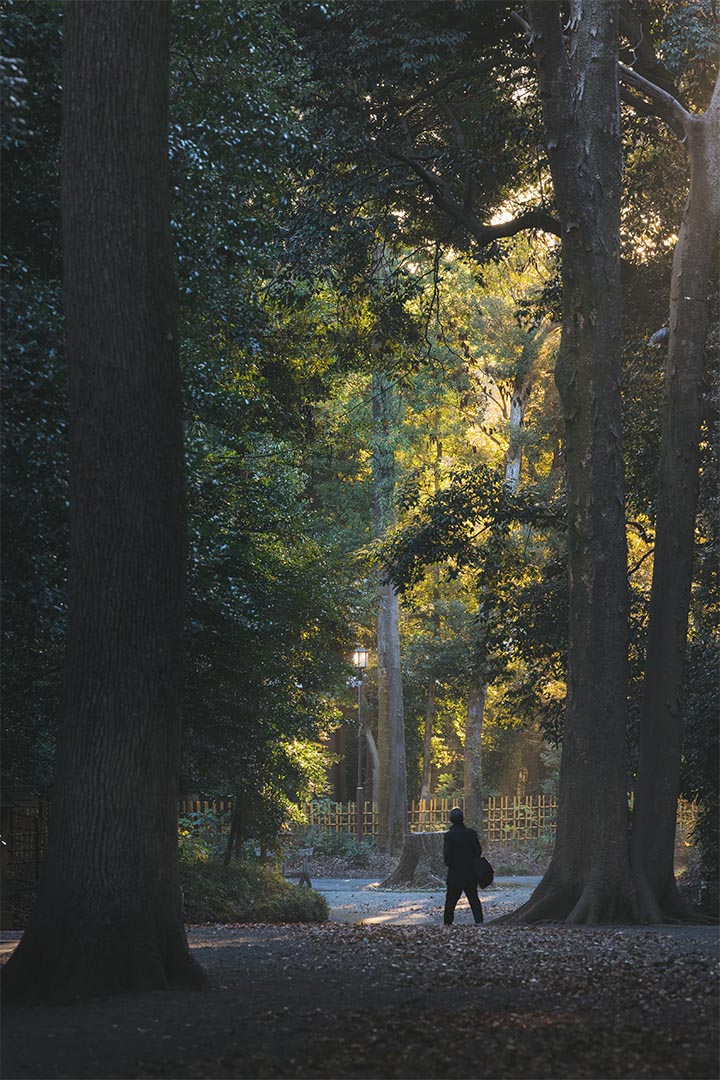
Experience Meiji Shrine’s full magic and schedule your visit for early in the morning. You can fully immerse yourself in the serene surroundings during this calm period, avoiding the hordes that usually congregate later in the day. Meiji Shrine’s subdued beauty makes for an ideal setting for composing photos with lone subjects, each conveying a story, and capturing the wide paths towards the different huge Torii gates.
Equip yourself with a tele-lens to enhance the visual impact of your photos of the Meiji Shrine and its Torii gates. With this equipment selection, you can achieve compression in your photos, highlighting the minute features of the shrine’s construction and drawing attention to far-off aspects.
Photography Spots: The Meiji Shrine Torii Gates
Discover Meiji Shrine’s artistic nuances from the unique viewpoints provided by its Torii gates. Three areas stand out as ideal photo ops: Jingu Nino Torii, Jingu Sanno Torii, and Jingu Kitasando Torii. Each has a distinct charm of its own.
- Jingu Nino Torii: Arranged along the shrine’s path, this Torii gate provides an enthralling visual tunnel that envelops your subjects in a sense of awe and mystery.
- Jingu Sanno Torii: This Torii gate, which is close to the main shrine building, offers a lovely background and lends a sense of classic elegance to your photos.
- Jingu Kitasando Torii: Take note of the distinctive viewpoint that this Torii gate offers as you explore the Kitasando entryway. Their positioning along the trail gives your photographs more depth and character while blending faith and the natural world together harmoniously.
Make the most of these Torii Gate photo opportunities by experimenting with different perspectives and compositions. A timeless and alluring visual harmony is created by the wooden gates set in the lush foliage of the shrine’s surroundings.
Nonbei Yokocho
Best photo spot in Shibuya
Best time: at night to see the vibrant lights
Photography Equipment: Prime-lenses and tele-lenses
Photo spot(s): inside Yokocho / Railroad underpass / from Miyashita Park
Explore the vivid passageways of Nonbei Yokocho in Shibuya, Tokyo, at night. Here, the bright lights come to life as the small streets reveal a different tale.
If you want to capture the full splendour of Nonbei Yokocho through street photography, schedule your visit during the evening. The small paths of Nonbei Yokocho transform into an enthralling tapestry of colours as the sun sets and the city lights flicker to life, providing a vivid and dynamic background for your photos. This photo location has a special appeal that comes from the play of artificial lights, shadows, and nighttime energy.
Prepare yourself with the ideal toolkit to capture the spirit of Nonbei Yokocho. Because of their large apertures, prime lenses are perfect in low light, enabling you to take beautiful pictures against the backdrop of street lights and neon signs. Having a tele-lens in your gear also increases versatility, allowing you to isolate particular features from the busy nighttime scene or catch candid moments from a distance.
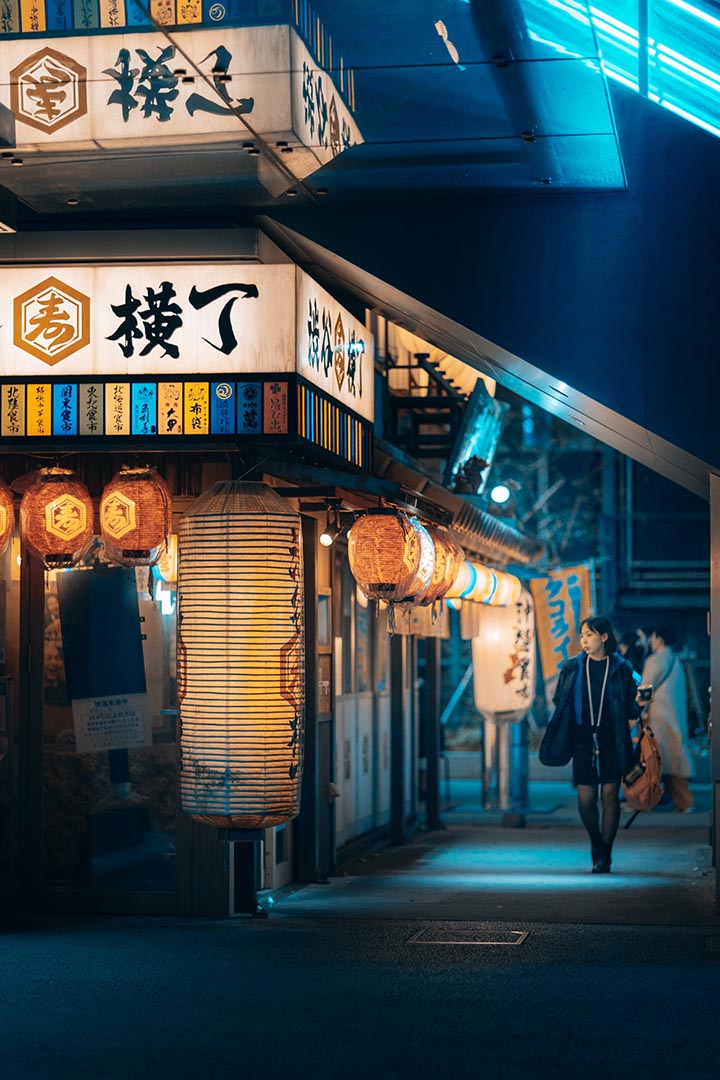
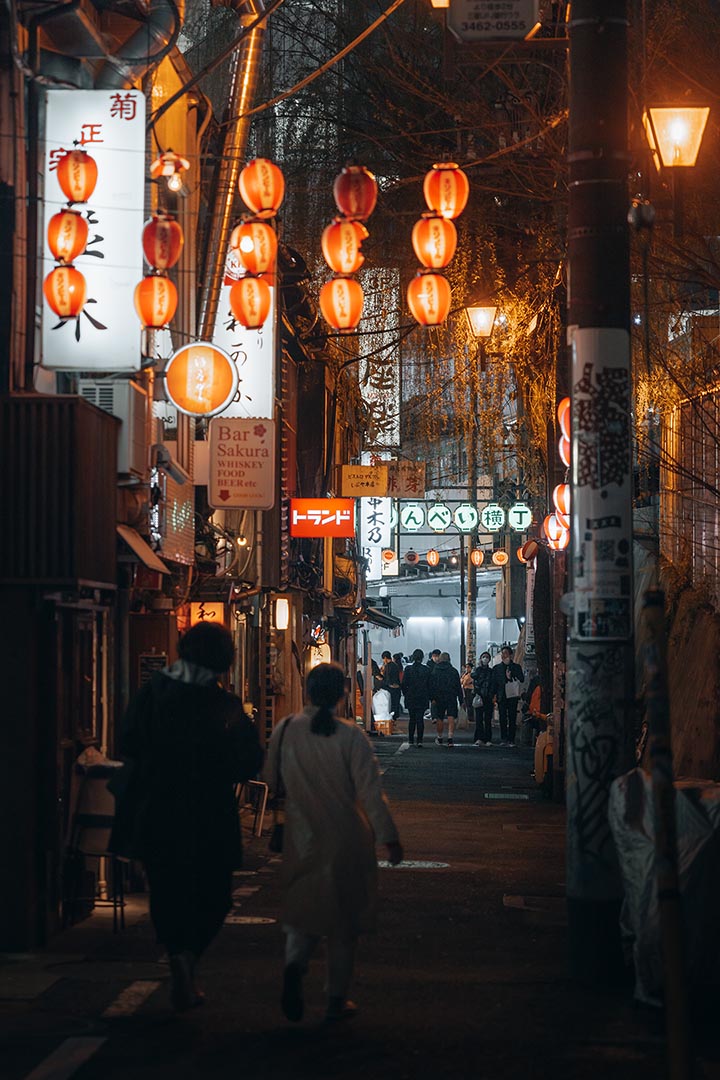
Photo Spots: Revealing Nonbei Yokocho’s True Nature
- Inside Yokocho: Enter the centre of Nonbei Yokocho and use the lively atmosphere of the bars, izakayas, and alleyways lit by lanterns as your canvas. Capture the warm light falling on the sidewalks with your lens, the personal moments between visitors and the fascinating intricacies of traditional signage.
- Railroad underpass: Travel in the direction of the railway subway that runs alongside Nonbei Yokocho. With the busy bustle surrounding it and the underpass’s convergent lines, this location presents a distinctive viewpoint. Try different tele-lens settings to get unscripted portraits and dynamic images of people passing.
- From Miyashita Park: Make your way up to Miyashita Park to take in the expansive aerial perspective of Nonbei Yokocho. With its elevated position offering a bird’s-eye view of the streets, Tokyo’s nightlife is captured in a striking sight that embodies its energy and vibrancy.
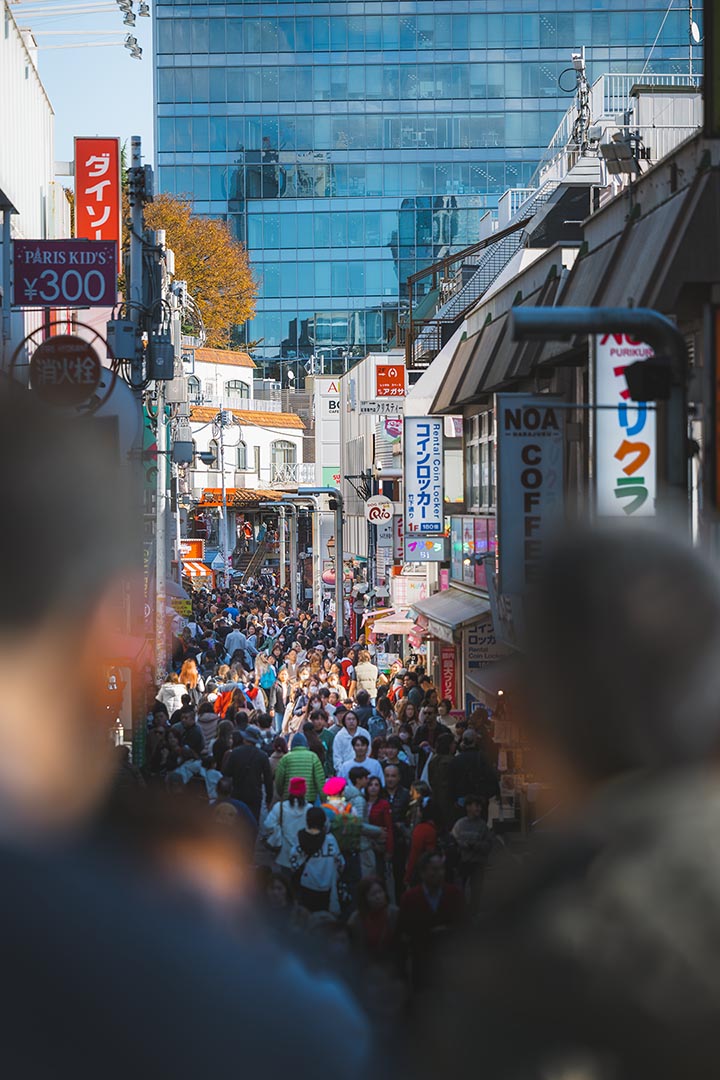
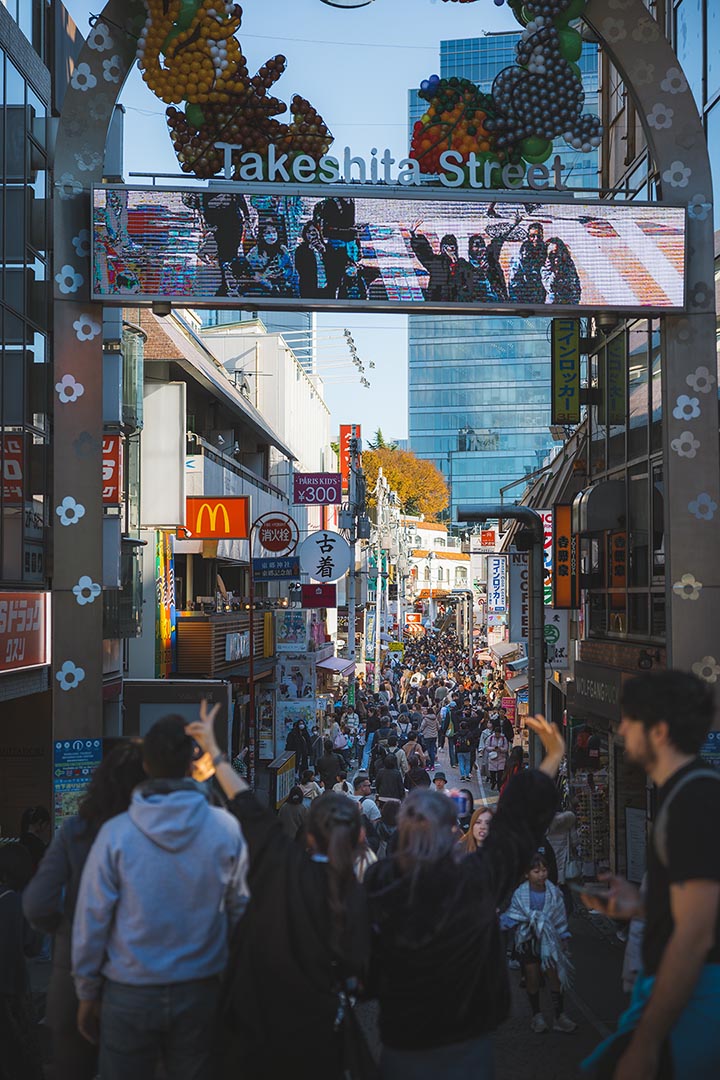
Takeshita Street
Best photo spot in Shibuyaa
Best time: afternoon, when the streets are busy
Photography Equipment: Tele-lens works here best
Photo spot(s): Takeshita Exit (35°40’17.7″N 139°42’11.1″E) at Harajuku Station
Enter the vibrant chaos of Takeshita Street, the beating centre of Tokyo’s Harajuku neighbourhood, where every step reveals a sight that begs to be photographed. We’ll work through all the details in this guide to help you take great street photos on Takeshita Street, from the best times and gear to the must-visit location.
Schedule your street photography session for the afternoon, when the streets come alive with a dynamic energy, to really capture the essence of Takeshita Street. The vibrant environment, varied fashion, and busy crowd provide a dramatic backdrop for your photos. This time of day offers a visual feast for your lens, as the movement of light and shadows gives your city scenes more depth and contrast.
Equip yourself with a tele-lens to manoeuvre through Takeshita Street with grace and ease. Because of its adaptability, a tele-lens lets you isolate subjects amidst the active commotion, gives you great compression, and zooms in on interesting details.
Takeshita Street can sometimes feel like you’re wading through a sea of people. Photographers may find it challenging, but the bright turmoil adds to the street’s attractiveness. Go straight to the Takeshita Exit at Harajuku Station if you’re taking a calculated approach. From here, you can see Takeshita’s lengthy street in its entirety.
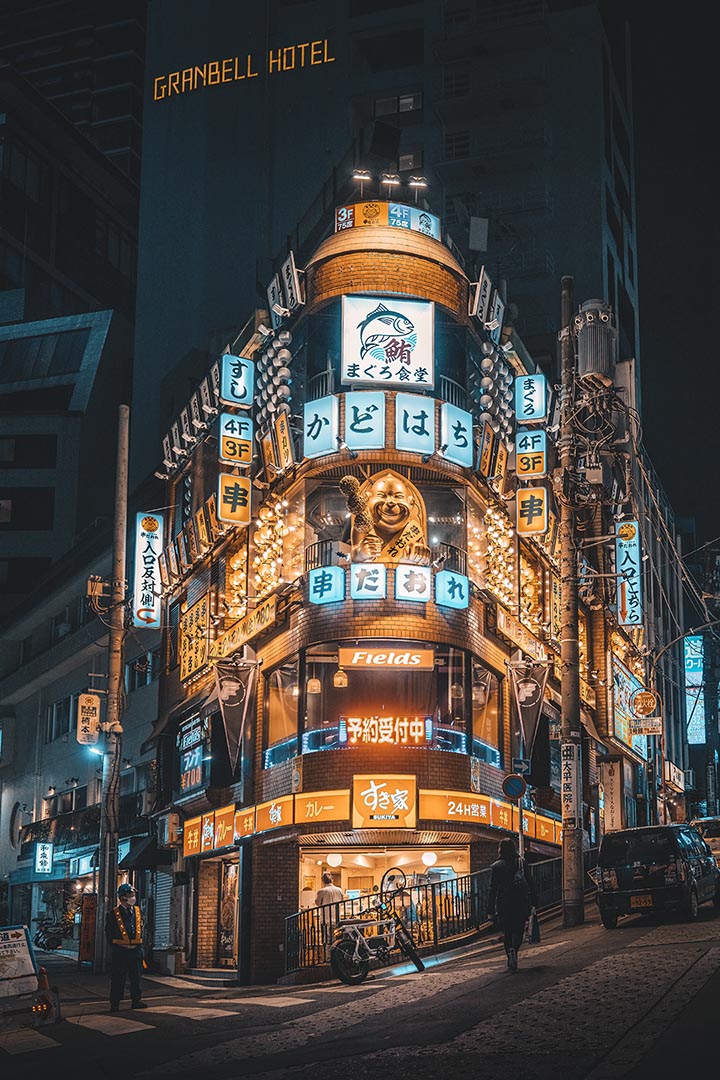
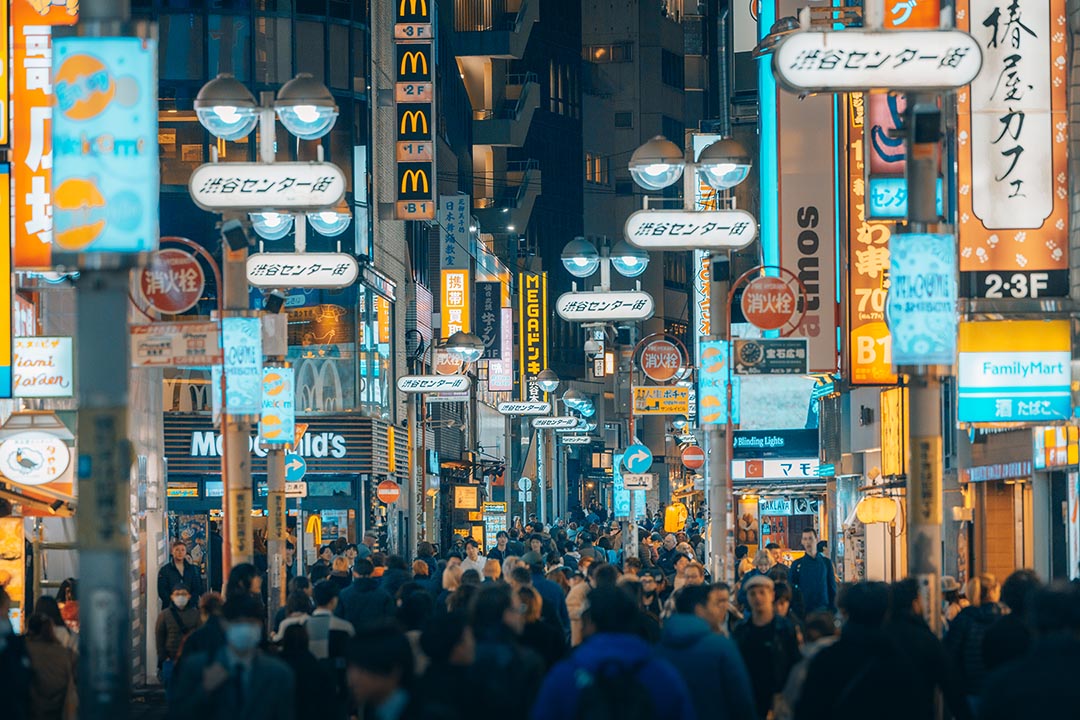
Center-Gai
Best photo spot in Shibuya
Best time: at night to see the vibrant neon lights
Photography Equipment: Prime-lenses and tele-lenses
Photo spot(s): Center-Gai Street and surroundings
Take a nighttime stroll along the lively and energetic Center-Gai Street, right in the heart of Shibuya. If you want to capture Center-Gai in all of its dazzling splendour, schedule your street photography trip for the evening. Center-Gai Street and the surrounding area come alive with an electric vitality that is ideal for taking striking nightscape photos as the sun sets and the city turns into a sea of coloured lights. Your photos will have a distinctive background thanks to the interaction of artificial lights and the humming of nighttime activities.
Take both prime and telephoto lenses if you want to capture the spirit of Center-Gai’s colourful evenings. Wide-aperture prime lenses are perfect for low-light conditions because they let you catch the vibrant street scenes and the minute details of the neon lights. To add to this, use a telephoto lens to focus on particular details and facial expressions in the busy nightlife.
There are lots of interesting places to take pictures along the whole Center-Gai Street stretch and its environs. Discover the vibrant scenes along the main drag, capturing the urban energy, fashion statements, and variety of individuals that characterise Shibuya’s evening. Explore the side lanes and streets for unexpected viewpoints and hidden treasures.
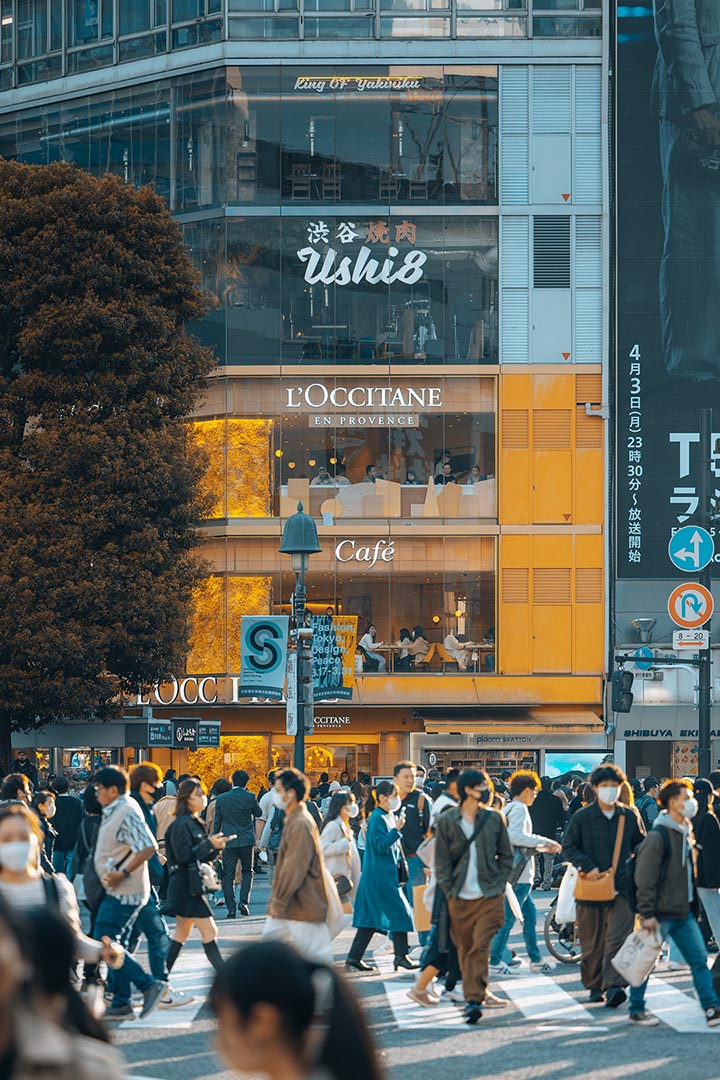
Shibuya Crossing
Best photo spot in Shibuya
Best time: afternoon and/or evening
Photography Equipment: all lenses work well
Photo spot(s): Crossing itself
Enter the bustling intersection of Tokyo’s Shibuya Crossing, where the contemporary pulse of the metropolis meets the rhythmic chaos of pedestrian currents.
Schedule your afternoon and evening street photography sessions to capture the dynamic energy and shifting moods of Shibuya Crossing. With the sun setting, the metropolis becomes a kaleidoscope of vibrant lights, illuminating the famous junction in a captivating and lively glow. During these hours, the combination of artificial and natural light gives your photos depth and drama, enhancing the allure of the bustling settings.
There are many different picture options around Shibuya Crossing, and depending on your creative concept, any lens can work nicely. It’s up to you whether you choose to zoom in for close-ups or take wide-angle pictures to show off the crossing’s expanse. Try using a variety of lenses to highlight the subtleties of this famous spot, such as the expansive junction and the private moments captured by people within the throng of people.
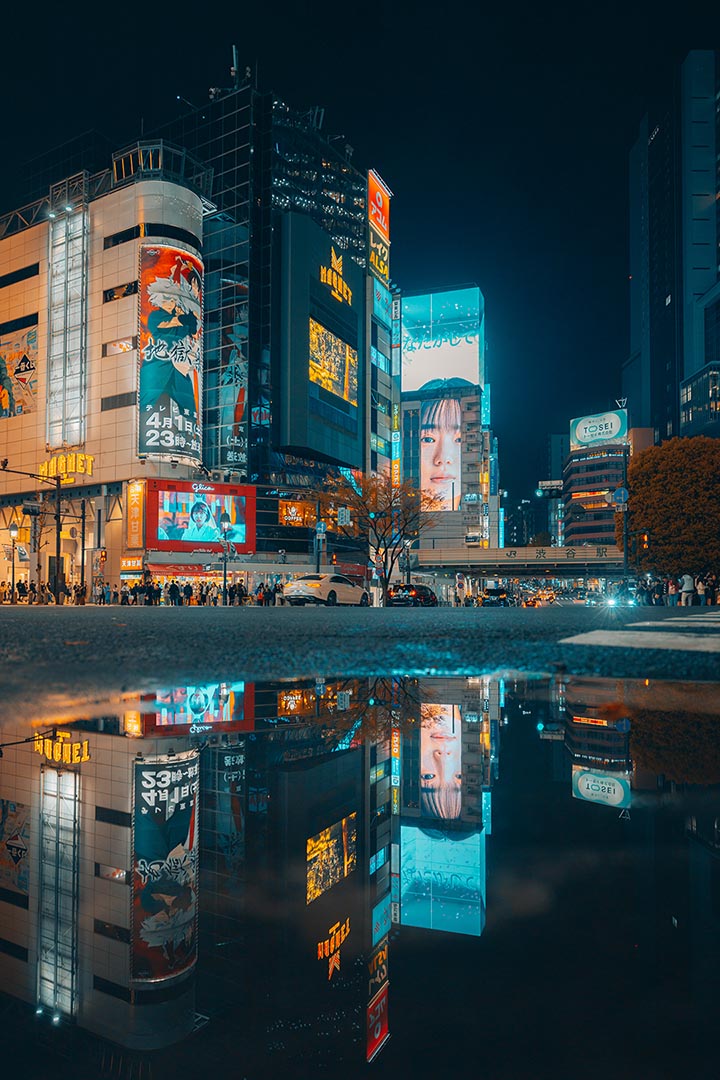
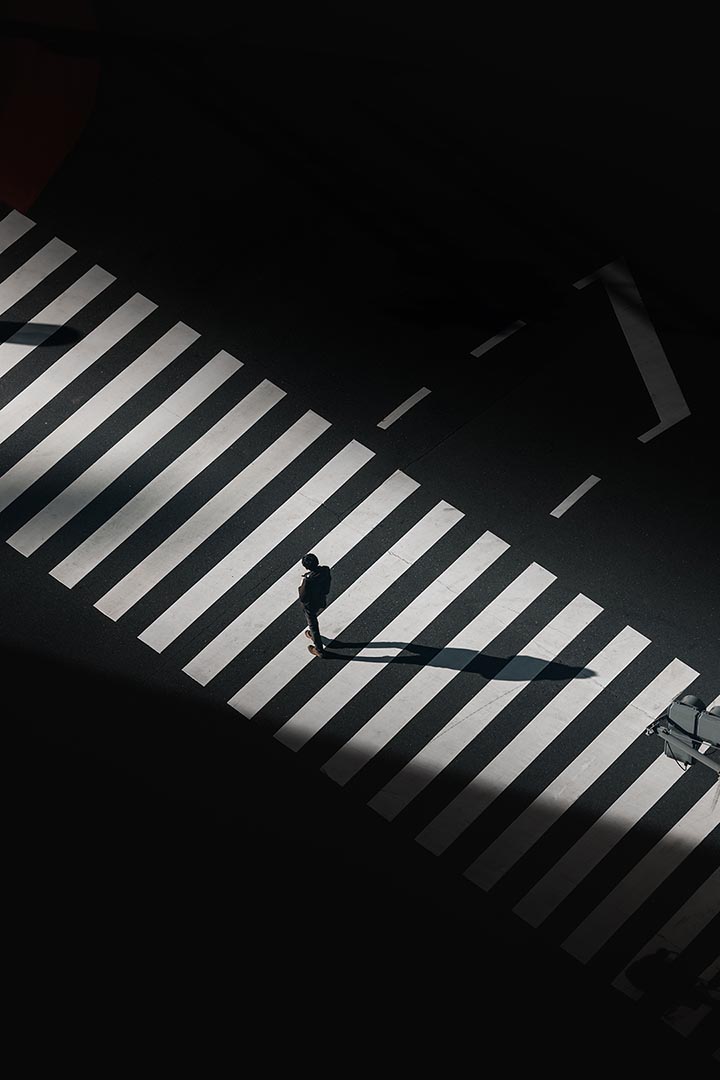
The crossing itself is without a doubt the main location for photos at Shibuya. To capture the ebb and flow of the human tide, take a strategic position on one of the pedestrian islands. Try a range of views and angles, from low-angles to high-angles, to capture the intensity and sheer size of Shibuya Crossing.
Rain-slicked walkways of Shibuya Crossing reflect the vivid lights and colours of the surrounding metropolis, creating a glittering spectacle on wet days. Take advantage of this natural occurrence by photographing the dynamic reflections and producing an engrossing visual story. Utilise compositional tricks to highlight the mirrored city lights against the wet surfaces in your Shibuya Crossing photos, giving them a more dramatic feel.
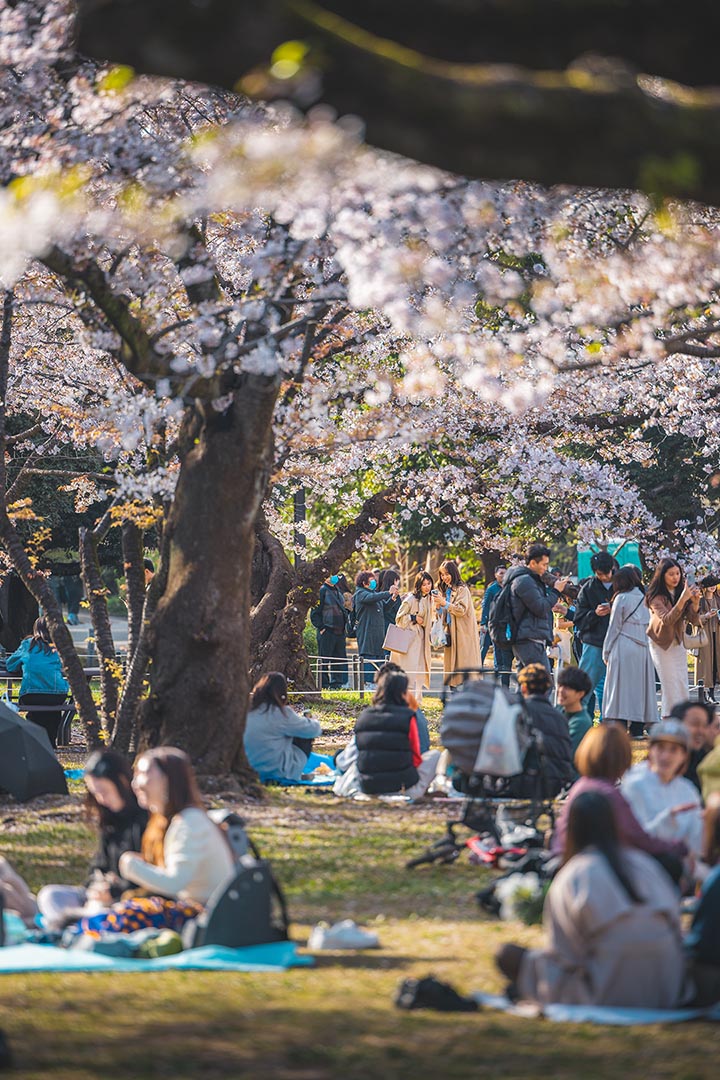
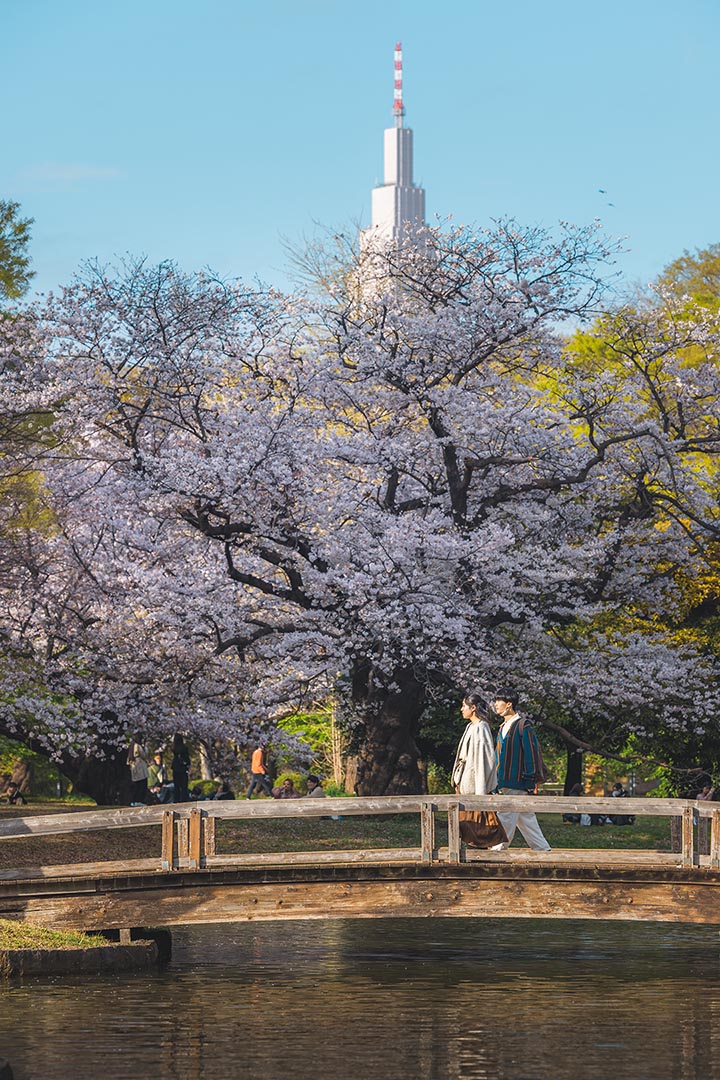
Yoyogi-Park
Best photo spot in Shibuya
Best time: morning during cherry blossom season
Photography Equipment: Tele-lenses to isolate subjects
Photo spot(s): Cherry Blossom garden / Park Central Pond
Take a visual tour of Yoyogi Park, an idyllic spot hidden away in the middle of Tokyo, Japan. If you want to really experience Yoyogi Park’s charm, schedule your photography adventure for the morning, especially if you want to take pictures of the cherry blossoms. The park is softly lit by the first light of dawn, providing a peaceful setting for photographing the transient beauty of cherry blossoms.
Photo Spots during Sakura season
- Cherry Blossom Garden: During cherry blossom season, Yoyogi Park’s Cherry Blossom Garden is a symphony of exquisite hues and fragrant petals. Focus on individual flowers with your telescopic lens to weave a picture of calm elegance.
- Park Central Pond: Create compositions that highlight the cherry blossom in the still waterways to give your images a lyrical and captivating quality. Yoyogi Park’s charm is captured in a visual poetry that is enhanced by the dawn light.
My full guide to all the best photo spots
Tokyo, Japan
Discover Tokyo’s 100 best photo spots through my handpicked Rexby Guide — from iconic views to hidden gems only locals know. Whether you’re into neon-lit streets, tranquil temples, or epic skyline shots, this guide helps you capture Tokyo’s magic like a pro. Perfect for photographers, content creators, and anyone chasing unforgettable visuals.
Best accommodations
Tokyo, Japan
Tokyo, Japan, is renowned for its incredible array of accommodations, catering to diverse tastes and preferences. While it may not be the most budget-friendly destination, the city offers a plethora of luxurious hotels that promise a memorable and indulgent stay. From opulent five-star establishments with breathtaking city views to elegant boutique hotels that showcase Japan’s unique hospitality, travelers are treated to an unforgettable experience. On the other hand, for those on a tight budget, there are plenty of affordable options such as hostels or capsule hotels, providing a comfortable and economical stay without compromising on convenience and cleanliness. Whether you seek lavish luxury or budget-friendly comfort, Tokyo’s accommodations ensure an unforgettable stay in this vibrant and dynamic city.

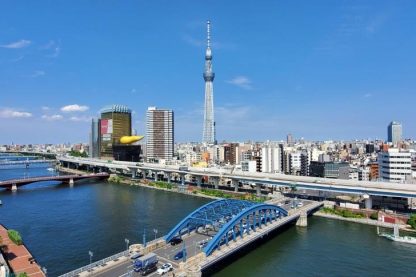
The Prince Park Tower Tokyo
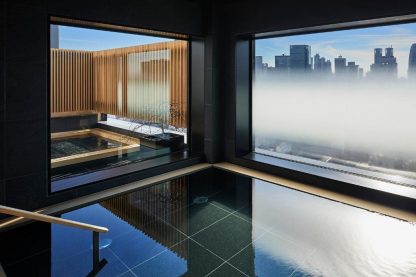
Onsen Ryokan Yuen Shinjuku
Wing International Select

You may also like
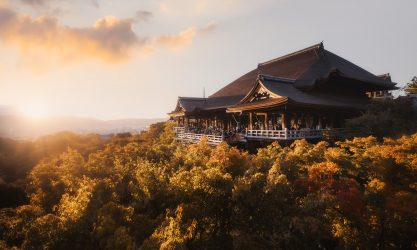
Kiyomizu-dera Photography Guide
Kiyomizu-dera is a beautiful temple in the city of Kyoto in Japan. It is one of the UNESCO World Heritage […]
Read More ›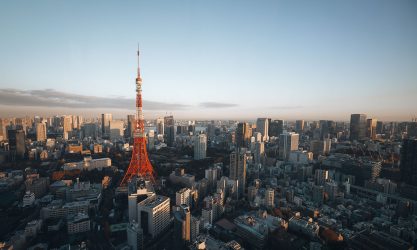
Azabudai Hills Sky Lobby - New viewpoint for Tokyo Tower
Welcome to the Azabudai Hills Sky Lobby, Tokyo’s newest and most beautiful view! The brand-new photo spot is right in […]
Read More ›
One comment